How to connect your Bluetooth Printer on your Ipad »
Setting up your ethernet printer STAR TSP100 or TSP100III (LAN) on the iPad
1. Connecting your printer
- Connect the power cord to your printer and an electrical outlet.
- Turn on the printer and wait for the Ready light to become solid.
- Optionally, connect the cable of cash drawer to your printer.

2. Inserting your paper roll

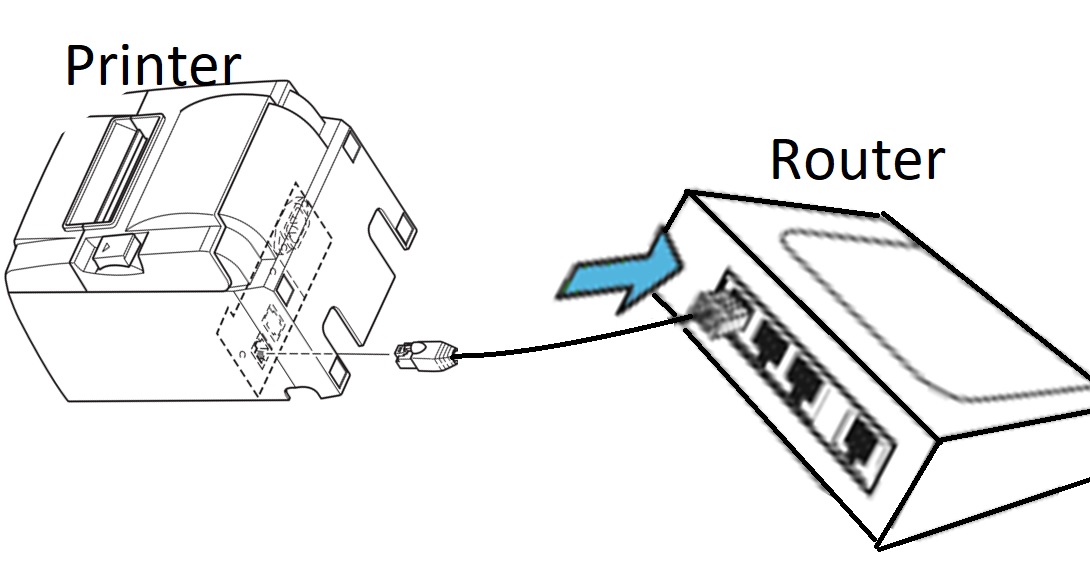
3. Connecting your printer to your internet rounter
- Connect one end of the ethernet cable to the ethernet port at the back of your printer.
- Connect the other end of the ethernet cable to an ethernet port on your internet router.
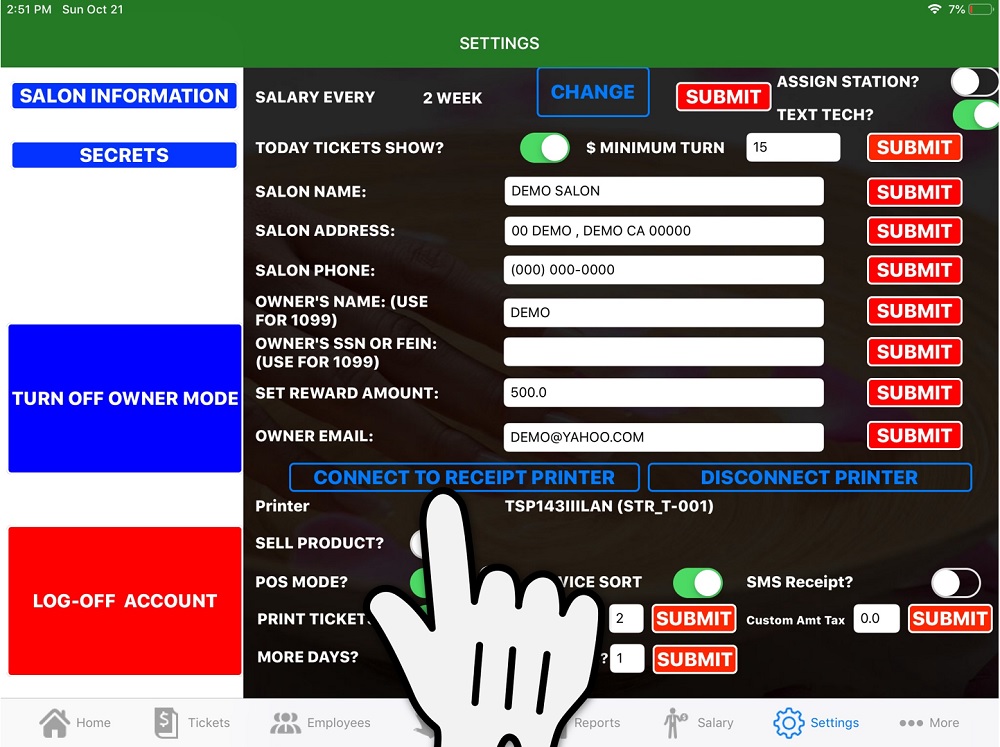
4. Assigning your printer to the app NAILSOLUTIONPLUS
- go to "ONWER LOGIN" of the app NAILSOLUTIONPLUS.
- then go to "SETTINGS"" .
- finally, click on "CONNECT TO RECEIPT PRINTER" and wait until you see a message saying "SUCCESS". If you see the message saying no printer found, then you have to check the connection from your printer to your router by trying different port. Attention! Printer and Ipad must connect to the same network in order to work
- ALL DONE. READY TO TEST YOUR RECEIPT PRINTER.
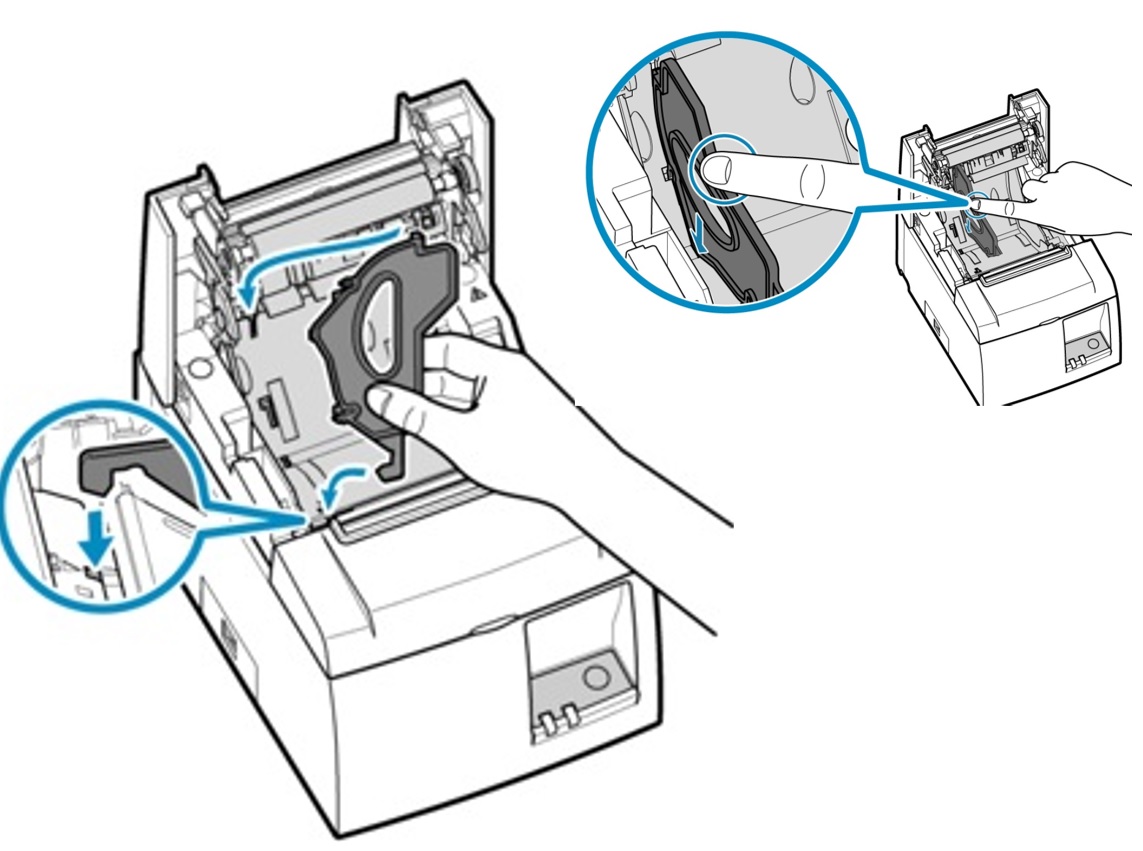
5. How to use small paper rolls (optional)
- Press the paper roll guide until a clicking sound is heard.
Training Videos »
How to connect your Bluetooth Printer on your Ipad »